

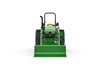


Front End Loaders For Tractors
500E Loader
Overview:
- Parking stands and couplers
- Hydraulic hose and fittings
- Quik-change attachment carrier
- Nitro-carbonized (nitrite or black) cylinder rods
Get A Quote
Fields with asterisks* are required. Please email our helpful staff with any questions or comments using the contact form.
Loan Calculator
Use the Loan Calculator to help you determine the financing and payment options that are best for you.
**The accuracy of this calculator and its applicability to your circumstances is not guaranteed. This information is provided for illustrative purposes only and does not constitute an application.
Send To A Friend
Fields with asterisks* are required. Your friend will receive an email that contains a reference to this page. Please send this email only to people you know who would be interested in this information.
Features
Parking stands and couplers
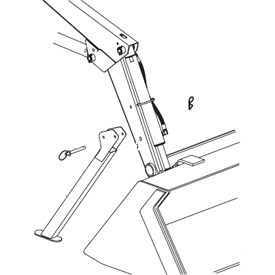 Parking stand
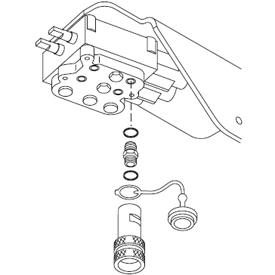 Parking stand coupler
For parking the 500E Loader.
The 500E loader is designed to be a rigid mounted loader to help be affordable as well as close to tractor for improved maneuverability and visibility.
If an upgrade is needed to allow for loader removal, the parking stand and coupler kit is available.
Once this kit is installed, it will have integrated parking stands and couplers to allow customer ease of removal.
Changing attachments
The John Deere 500 Style attachment carrier allows one person to quickly change attachments without the use of tools.
Changing from bucket to pallet fork or bale spear takes only seconds to allow for increased productivity.
Simply remove the retaining pin on each side of carrier, back away from first implement, connect to second and reinstall clip pins.
No tools needed nor heavy pins to pull.
Step 1
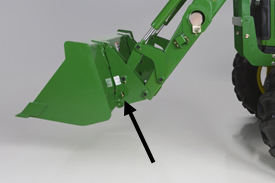 Retaining pin
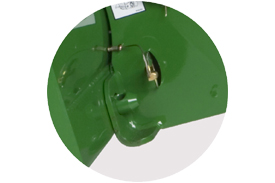 Detail of indicated area with pin in storage area
With the bucket level or slightly rolled back, simply remove the retaining pins and place in storage position.
Step 2
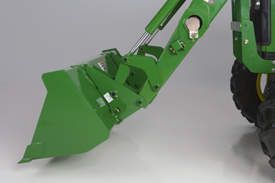 Roll the attachment forward to disengage pins
Roll the attachment forward to disengage the lower pins.
Step 3
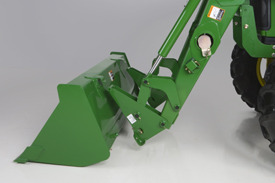 Lower attachment to ground-disengage top hooks
Lower the attachment to the ground to disengage the top hooks.
Step 4
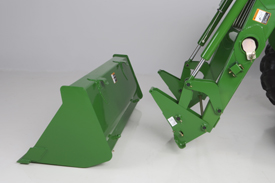 Back away from attachment
Back away.
To install another attachment simply reverse these steps.